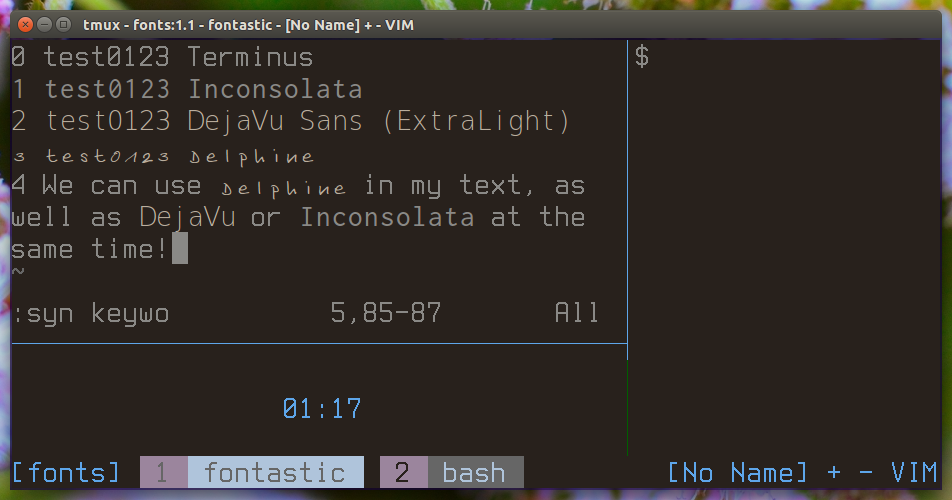

This is a slight cheat, but it works great if you want to be able to have a separate font as a way of doing highlighting (e.g. set comments in a thinner font). The way this works is by exploiting rxvt-unicode's ability to customize the fonts for normal, bold, italic, and bold-italic attributed text. The downside is the loss of actually displaying bold or italic text. Since italic text usually doesn't work out as well as hoped, this might not be too much of an issue.
This step isn't needed if you run Vim straight. However, if you want to overload italic to be a different font, applications need to know how to make text italic and pass to tmux. To that end, you must configure your system to handle that, either by using an appropriate TERM setting, or forcing Vim to send the appropriate codes in spite of the TERM setting. (links pending).
For the examples here, I used 4 fonts: Terminus, Inconsolata, DejaVu Sans, and Delphine. There are two (or more, but I'm going to show two) ways to set these: X Resource settings, or via escape sequences at runtime.
A propably important thing to do is to make sure that the characters of the different fonts are actually the same size. Different fonts can be different sizes at the same reported pt size. Fortunately, rxvt-unicode (or, xft really) allows us to specify pixel size instead of pt size. Use this and set the same size for all 4 fonts.
Run time config is done via escape sequences, which is great if you want to
swap out the fonts or change the size as you go. Here is an example of setting
these from bash:
echo -e '\033]710;xft:Terminus:antialias=true:pixelsize=40\033\\' - Font for normal use
echo -e '\033]711;xft:DejaVu Sans:ExtraLight:antialias=true:pixelsize=40\033\\' - Font for "Bold" text
echo -e '\033]712;xft:Inconsolata:antialias=true:pixelsize=40\033\\' - Font for "Italic" text
echo -e '\033]713;xft:Delphine:antialias=true:pixelsize=40\033\\' - Font for "Bold Italic" text
X resources can be done by placing lines like the following into ~/.Xdefaults or similar. See "man urxvt" for more information
URxvt.font: xft:Terminus:antialias=true:pixelsize=40 - Font for normal use
URxvt.boldFont: xft:DejaVu Sans:ExtraLight:antialias=true:pixelsize=40 - Font for "Bold" text
URxvt.italicFont: xft:Inconsolata:antialias=true:pixelsize=40 - Font for "Italic" text
URxvt.boldItalicFont: xft:Delphine:antialias=true:pixelsize=40 - Font for "Bold Italic" text
Note that I enable antialiasing, because I like how it looks usually. According to the man page, this can result in poor performance on many systems. Set it according to your preference.
At this point, you can now set your highlight groups to bold or italic or bold,italic. The example at the top used these:
:hi boldital cterm=bold,italic
:hi ital cterm=italic
:syn match boldital /^3.*$/
:syn match bold /^2.*$/
:syn match ital /^1.*$/
:syn keyword boldital Delphine
:syn keyword bold DejaVu
:syn keyword ital Inconsolata
You might notice that I didn't specify a highlight for bold. This is because my Vim already had it.
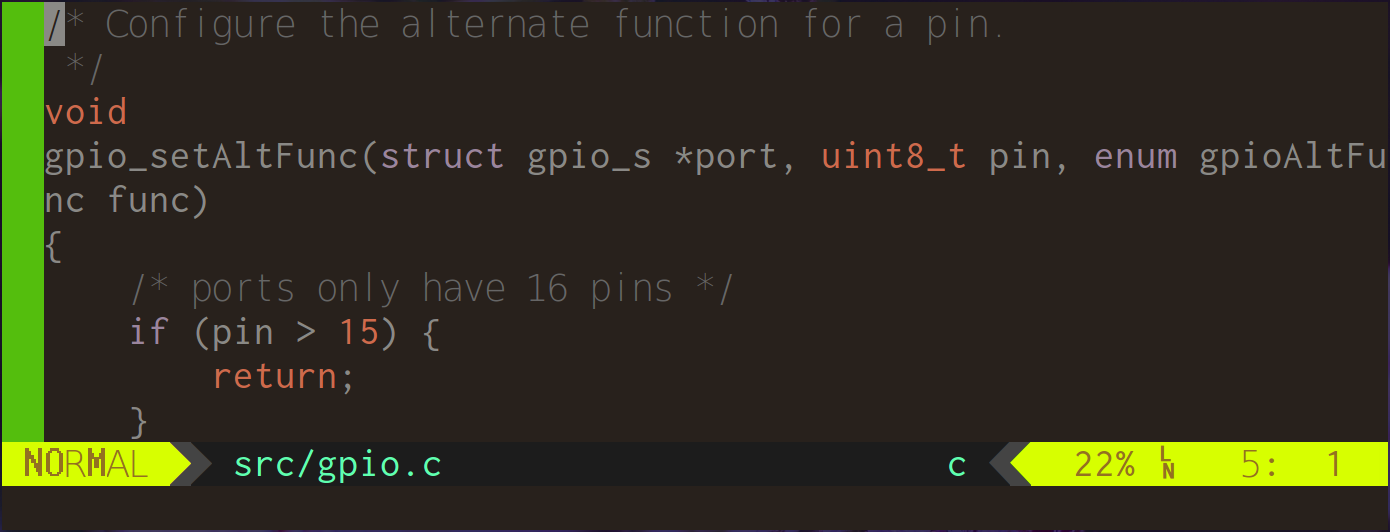
Finally, here is a shot of some code where things are normal, except comments are in the thinner DejaVu Sans, by setting :hi Comment cterm=bold

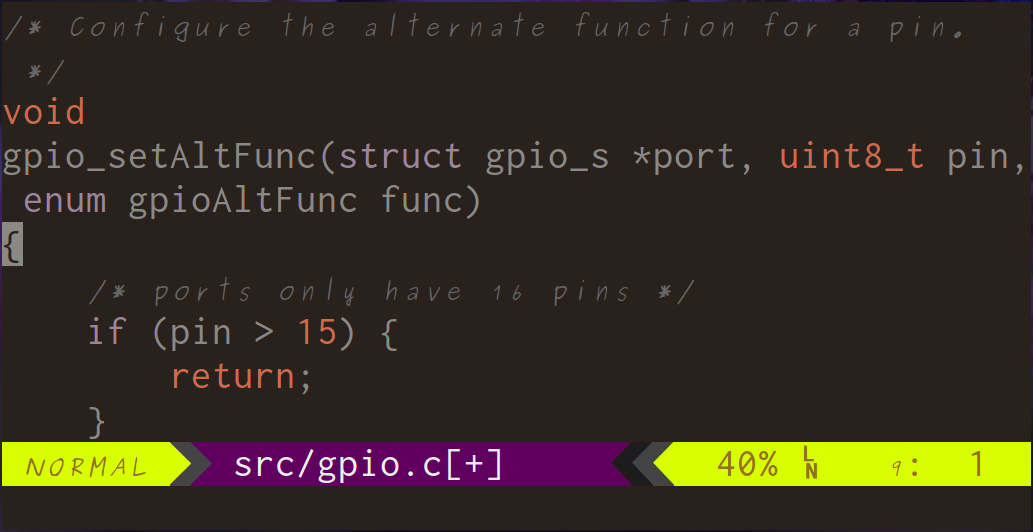
Comments (or anything marked "bold") set in "purisa", Oblique. echo -e '\033]711;xft:purisa:Oblique:antialias=true:pixelsize=23\033\\'. Note, the pixelsize is set to 23. Using 40 here resulted in the font being too small for some reason, but size 23 made it bigger. I do not understand this, so YMMV.
